

How to Make Cinnamon Rolls: Easy Recipe

Delicious Homemade Cinnamon Rolls: Easy Recipe. Get ready to indulge in the irresistible aroma and mouthwatering flavor of homemade cinnamon rolls. I’ll share my foolproof recipe for soft, gooey, and perfectly spiced cinnamon rolls. You’ll delight your family and friends with these treats.
With step-by-step instructions and valuable tips, you’ll enjoy the comforting warmth of freshly baked cinnamon rolls. You can do it all in the comfort of your own kitchen.

Key Takeaways
- Discover the secret to making delectable homemade cinnamon rolls
- Learn how to create the perfect soft and gooey texture
- Explore the rich history and traditions behind this beloved baked delight
- Understand the importance of using high-quality ingredients
- Follow step-by-step instructions for flawless cinnamon roll preparation
Introduction: The Allure of Homemade Cinnamon Rolls
The smell of cinnamon rolls baking is amazing. It’s a mix of warm dough, gooey cinnamon, and sweet icing. I’ll share my top recipe and tips for making cinnamon rolls that will wow everyone.
Cinnamon rolls are a favorite baked goods loved by many. They’re perfect for breakfast or a sweet treat any time. Homemade cinnamon rolls are great for brunch, a family treat, or just because.
We’ll look into the history and traditions of breakfast pastries. We’ll also cover the essential ingredients and steps for making cinnamon rolls. Plus, we’ll share secrets to get that bakery taste at home.
“There’s nothing quite like the smell of freshly baked cinnamon rolls to make a house feel like a home.”
Cinnamon Rolls: A Beloved Baked Delight
Cinnamon rolls have a long history, starting in the early 1800s. They were first enjoyed as a regional treat. Now, they’re a favorite for cozy mornings, family times, and special events.
The History and Traditions Behind Sweet Rolls
The roots of cinnamon rolls go back to Scandinavia in the 1700s. As they traveled to Europe and North America, they picked up local flavors. Today, cinnamon rolls are a staple in many homes, with each family having its own special recipe.
Why Homemade Cinnamon Rolls are Worth the Effort
Homemade cinnamon rolls offer a unique taste and experience. The smell of fresh dough, the mix of cinnamon and sugar, and the creamy frosting are all part of the joy. Making them from scratch is also a rewarding and calming activity, allowing you to add your own touch and share family traditions.
“There’s nothing quite like the smell of homemade cinnamon rolls wafting through the kitchen on a cozy morning. It’s a moment of pure joy and comfort.”
Making cinnamon rolls from scratch is a labor of love. It results in a delicious treat that brings joy to those who share it with you.

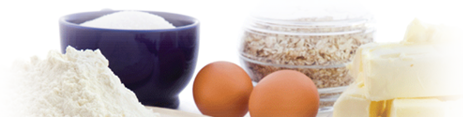
Ingredients for Irresistible Cinnamon Rolls
Making the perfect homemade cinnamon rolls needs the right ingredients. You’ll need soft dough, gooey cinnamon filling, and creamy icing. Each part is crucial for the ultimate cinnamon roll taste. Let’s explore the key ingredients for these tasty treats.
The Dough:
The base of a cinnamon roll is the yeast dough. To get a soft and fluffy texture, you’ll need flour, sugar, salt, butter, milk, and yeast. These mix together to make a dough that rises beautifully.
The Filling:
The cinnamon-sugar filling is the star. It’s made with brown sugar, cinnamon, and butter. Spread on the dough, it creates a delicious swirl and gooey center.
The Icing:
No cinnamon roll is complete without creamy icing. The icing needs powdered sugar, cream cheese, vanilla, and a bit of salt. This icing adds sweetness and creaminess to every bite.
With these ingredients, you’re ready to bake cinnamon rolls that everyone will love. Now, let’s learn how to make these treats from scratch.

Step-by-Step Guide to Making Perfect Cinnamon Rolls
Get ready to bake up a batch of mouthwatering homemade cinnamon rolls! I’ll guide you through the process, from preparing the yeast dough to baking the golden, cinnamon-infused treats to perfection.
Preparing the Dough
First, we’ll start by activating the yeast in a warm milk mixture. Then, we combine the dough ingredients to create a soft, pillowy base. Knead the dough until it becomes smooth and elastic.
Let it rise until it has doubled in size. This crucial step ensures your cinnamon rolls will have a light and airy texture.
Rolling and Filling the Rolls
Next, roll out the dough into a large rectangle. Then, spread the cinnamon sugar filling across the surface. Carefully roll the dough into a tight spiral.
Finally, slice it into individual rolls. Arrange the rolls in a baking dish, ready to be baked to perfection.
Baking to Golden Perfection
Finally, I’ll guide you through the baking process. Ensure your cinnamon rolls emerge from the oven with a golden-brown crust and a fragrant, cinnamony aroma. Keep a close eye on them to achieve the optimal baking time.
Resulting in cinnamon rolls that are soft, gooey, and utterly irresistible.
FAQ
What are the main ingredients needed to make homemade cinnamon rolls?
To make homemade cinnamon rolls, you’ll need flour, yeast, milk, and butter. Sugar, eggs, and cinnamon are also essential. Don’t forget salt and vanilla extract for extra flavor.
How long does it take to make cinnamon rolls from scratch?
Making cinnamon rolls from scratch takes time, but it’s worth it. The whole process, from mixing to baking, takes about 2-3 hours. This includes time for the dough to rise.
Can I make the dough ahead of time?
Yes, you can prepare the dough ahead of time. Just mix it, put it in a greased bowl, cover it, and refrigerate for up to 2 days. Let it come to room temperature before baking.
How do I get the perfect cinnamon roll texture?
For the perfect texture, don’t over-knead the dough. Also, let it rise well and bake it just right. This will give you soft, pillowy rolls.
Can I freeze homemade cinnamon rolls?
Yes, you can freeze homemade cinnamon rolls. Bake them, cool them, and then wrap them in plastic or foil. They can stay frozen for 2-3 months. Just thaw and reheat in the oven when you want to enjoy them.
How do I get the perfect amount of cinnamon sugar filling?
For the perfect filling, use 1/4 cup brown sugar and 2 teaspoons cinnamon for 12 rolls. This mix is sweet and gooey without being too much.
Can I add any additional fillings or toppings to the cinnamon rolls?
Absolutely! You can add many things to cinnamon rolls. Try chopped pecans, raisins, cream cheese frosting, or caramel or chocolate sauce.
Frequently Asked Questions
How important are the essential ingredients for making cinnamon rolls?
The essential ingredients play a crucial role in achieving delicious cinnamon rolls. Each ingredient, such as flour, sugar, yeast, and cinnamon, contributes to the flavor and texture of the final product. Using high-quality ingredients ensures the best results.
Can I prepare the dough for cinnamon rolls in advance?
Yes, you can prepare the dough ahead of time by following these steps: mix all ingredients together until a smooth dough forms, cover it tightly with plastic wrap or place it in an airtight container, and refrigerate for up to 24 hours. This allows flavors to develop and saves time on baking day.
How do I craft the filling for my cinnamon rolls?
To make a delectable filling for your cinnamon rolls, combine brown sugar with softened butter and sprinkle ground cinnamon evenly over it. Mix everything until well incorporated. The resulting mixture should be spread generously over the rolled-out dough before shaping into rolls.
What is the proper way to shape and cut cinnamon rolls?
After spreading the filling on your rolled-out dough rectangle, carefully roll it up from one end to create a log shape. Then use a sharp knife or dental floss to slice even sections from this log (about 1-2 inches thick). Take care not to press too hard while cutting so as not to squash them.
Why is there a second rise needed when making cinnamon rolls?
The second rise allows yeast activity within each roll’s structure after they have been shaped and cut. This additional rising time enhances their lightness and fluffiness while developing more complex flavors. It also gives them ample time to expand before baking into perfectly puffy treats.
MISC Recipes
- Recent
- Popular
- Random


Goat Cheese and Chorizo Rolls
(4.3 / 5)
-

Indulgent Flourless Chocolate Cake: Quick & Simple
(0 / 5)
Pimento Cheese Potato Skins
(4.3 / 5)
